Friday, December 31, 2010

Favorite Recipes of 2010

Today is the last day of 2010. It's hard to believe I started this journey of food blogging one whole year ago! Since then I've been having so much fun in the kitchen baking and cooking new recipes to share with everyone. I've posted 151 recipes to be exact!!! I have received so many wonderful comments from relatives, friends, and complete strangers. It has been an amazing adventure and I can't wait to see what 2011 has in store.

This April I am going back to college....cooking school that is! I am going to get a Certificate in Professional Baking and Pastries. I am so excited and want to soak up as much information, cooking skills, and recipes that I can! I have no doubt that this blog will only benefit from the classes I will be taking.

Before 2011 begins, I want to take a moment to highlight a few of my favorite recipes from 2010. Ones that I continually get positive feedback from; ones that I find myself making over and over again when we have company; my top 3 favorites!

- - - - - - - - - - - - - - - - - -

Kathie's Favorite Recipe #1 - Honey Lime Chicken Enchiladas

I have made these many times this year especially when we have guests over for dinner. Every time I make these, people comment how amazing they are. It is definitely one of my new favorite meals!


- - - - - - - - - - - - - - - - - -

Kathie's Favorite Recipe #2 - Mini Meat Loaves

I just love these little meatloaves. They are so full of flavor and so fun to eat. They also make a great freezer meal. You can make them for expectant parents (like I did), someone who is sick, or for your own freezer so you can have a ready-to-make meal on hand when you are short on time!


- - - - - - - - - - - - - - - - - -

Kathie's Favorite Recipe #3 - Tres Leches Cake

This is my hubby's favorite recipe of 2010 and I'm a huge fan as well! I've made this for several occasions this year - birthdays, dinner at a friend's house and even for Christmas!


Cheers to everyone on this New Year's Eve! May you all have a very happy and blessed 2011!!!

Thursday, December 30, 2010

Filipino Chicken Adobo

A New Jersey church friend of ours introduced us to Adobo Chicken this past summer. I pretty much fell in love with it immediately. It was jam packed with flavor and the chicken was so tender! For some reason I started thinking about adobo this week so I "Googled" it and found this recipe on The Food Network's website. It turned out AMAZING!!! My husband said it was the best chicken ever and gave it a 10 out of 10!

I wish I could share smells over my blog because I don't think the picture does justice for this recipe. It is just so good, flavorful, and so tender! We loved it!!!

You can also add pork to this recipe. Thanks Feli for inspiring me to make this delicious dish!


Tuesday, December 28, 2010

Black Bean Soup


My little boy loves black beans. Every time we have something with beans in it (like cowboy caviar, black beans and rice, etc.) he always picks them all out and eats them immediately then asks for more. When I saw this recipe #1 I wanted to make it for him and #2 I thought it sounded really good too! It's a recipe originally from Paula Deen and has bacon in it. Yum!

Very good soup! I paired it with some TGI Friday's Chicken Quesadilla Wraps that I found in the freezer section at the local grocery store. It made a very easy and delicious dinner tonight. Needless to say, my little boy demolished his bowl and asked for seconds.

Sunday, December 26, 2010

Best Spinach and Artichoke Dip

We had a dinner party with several of my husband's coworkers last weekend. There were 3 different appetizers and this was by far the biggest hit. We pretty much demolished the entire dish and I can honestly say it's the best spinach artichoke dip I've ever had! This recipe is a keeper!


Friday, December 24, 2010

Jalapeno Popper Dip


Several years ago (when I was in highschool) I worked at a rootbeer stand. One of my favorite items on the menu was Jalapeno Poppers. I still love them to this day! I saw this recipe and had to try it. It was so good and really did remind me of Jalapeno Poppers. This would make a perfect appetizer for a football game or New Year's Eve party!

Don't let the Panko bread crumbs scare you away. I didn't know what they were either. Panko is a flaky bread crumb used in Japanese cuisine as a crunchy coating for fried foods. Panko is made from bread without crusts, and has a crisper, airier texture than most other types of bread crumbs. Just look in your local grocery store next to the regular bread crumbs and you are likely to find them.


Wednesday, December 22, 2010

Holiday Cheese Truffles

These cheese truffles turned out great! I loved the presentation and their taste! They made a great additional to our holiday party that we hosted last weekend. You can roll the cheese truffles in whatever you like. I used pecan bits, fresh diced parsley, shredded cheese, and paprika. The recipe says it makes 24 truffles but I made mine a bit smaller which made about 34. Making them smaller made them much more bite-size.

Again, I just love the presentation of these little guys. Huge thanks go out to my brother-in-law and his wife for this adorable plate they bought me. l love it!!! :)


Monday, December 20, 2010

Reindeer Sugar Cookies

Can you spot Rudolph in this picture? :) I love these little reindeer cookies! The website where I got this idea from contains a sugar cookie recipe that you can use. Or you can take the easy route like I did and use already-made sugar cookie dough. My son had a cookie dough fundraiser a month ago so I had some in the freezer that needed to be used up.


The cookies in the picture above were made by taking baked sugar cookies and cutting them in fourths. The antlers are the letter "E" from a bag of alphabet pretzels I found at Meijer. I used mini M&M's for the noses.

The cookies below are bigger. I made one reindeer out of one baked cookie by just cutting a couple strips off the sides. I cut off the top edge of mini pretzels to make the antlers and used regular sized M&M's.


Saturday, December 18, 2010

Mixed Up Snowman Snacks

My son's preschool Christmas party was this week and I wanted to take something fun to pass out to his classmates. I found this adorable idea on a blog call Gourmet Mom on-the-Go. It's called Mixed Up Snowman Snacks and it makes the perfect snack for little fingers. It consists of mini marshmallows (snowballs), mini chocolate chips (buttons and eyes), fruit roll up (scarf), pretzel sticks (arms), orange sprinkles (noses), and junior mints candy (hats). The kids are going to love these! Gourmet Mom even provides a link to the labels to print! Super easy and super cute.

*If I were to do this again, I would use either red or green fruit rollups for the scarves. The multi-colored fruit rollup just didn't look as pretty.


Thursday, December 16, 2010

Pepperoni Pizza Puffs


I love these little pizza bites! They are so good and fun to dip in the pizza sauce. This would be a great appetizer to serve for a football game or birthday party. The leftovers were even good the next day. I will definitely be making these again soon!

Tuesday, December 14, 2010

Caramel Fondue

As promised, here's the caramel fondue recipe. My mom used to make this a lot when I was a kid. It can be served warm or cold. I served it warm, but the cold leftovers the following day were just as good!


Some of the dippers included apple slices, strawberries, and bananas. My personal favorite is the caramel fondue with banana slices! (At least the banana part of it is healthy! haha)


Monday, December 13, 2010

Easy Chocolate Fondue

Some of my husband's relatives stayed with us last weekend. It was so great to see them and spend time with their family. On Saturday night we had a Fondue/Game night. I served chocolate fondue and caramel fondue with all the fixings. It was so good!!! Fondue has always been a favorite of mine. I could just stand by the fondue pot and dip/eat for hours! :)


Some of the dippers included brownies, pound cake, and marshmallows. Mini oreos and cheesecake would also be good!


Here's the chocolate fondue recipe. Tomorrow I will post the caramel fondue recipe.

Saturday, December 11, 2010

Santa Party Mix

I have found so many cute Christmas candy recipes this year! I've just been having a blast in my kitchen lately. Check out these adorable little Santa hats! Aren't they cute?!?!


They are made out of caramel bugles (you can use plain ones too) and mini marshmallows. I haven't had bugles for years and it was the first time I'd ever had CARAMEL bugles. They were so good that I seriously could have eaten a whole bag before I even started dipping them!

After making these Santa hats, you can add them to a chocolate covered party mix and it will be the hit of the party! Enjoy!!!


Thursday, December 9, 2010

Chocolate Covered Marshmallow Snowmen


My almost-4-year-old and I had so much fun in the kitchen this morning! Isn't this family of snowmen the cutest?!?!?! I got a little extra creative and made the little babies by using pretzel sticks and mini marshmallows. I am in love with them!


The idea of using mini M&M's to decorate the snowmen came from a blog called Speckled Egg.


The idea of this cute couple came from a blog called Icing Designs. I just adore how the women have long eyelashes and scarves while the men are wearing hats.

Tuesday, December 7, 2010

Chocolate Covered Pretzels

Chocolate covered pretzels are always a huge hit with my family around the holidays. Have fun and decorate them with anything you can find in your pantry. I had made these for our Thanksgiving dinner but you could easily use red and green sprinkles instead.

A lot of times around the holidays you can find pretzels in the shape of Christmas trees too! Those are always fun to dip.


Sunday, December 5, 2010

5 Minute Turtles


This is one of my favorite holiday candy recipes! These bite size turtles are delicious and so easy to make. All you need is 5 minutes and 3 ingredients!

Some members of my family do not like pecans, so this year I topped 1/2 with pecans and 1/2 with M&M's then dazzled them up a bit more my drizzling chocolate over the top. These are sure to be a big hit at your upcoming Christmas party!

Friday, December 3, 2010

Pumpkin Pie Bites


I know it's a little late for this recipe but I just now got around to posting it. Sorry...but perhaps you can keep it in mind for next year! :)

I made these little delights for our Thanksgiving Day dinner this year. They were yummy and pretty cute too!

Wednesday, December 1, 2010

Mexican Monkey Bread

I served this Mexican Monkey Bread with PW's cauliflower soup the other night. My hubby and I loved it! It's buttery, cheesy, and the jalapenos add a great kick to it!

This bread is best when served right out of the oven; however, we made ham sandwiches out of it the following day and they sure were good!


Monday, November 29, 2010

Cauliflower Soup

Yes, you read the title correctly...I made cauliflower soup. I was quite skeptical about this recipe at first, but in the back of my mind, I knew if The Pioneer Woman made it then it had to be good.

It made a huge pot of soup and my biggest fan was my preschooler. He demolished his bowl instantly! My husband said he liked it also but I think he was just trying to be nice. ;) As for me...I did not care for it at all. I can honestly say I tried to like it and I have nothing against cauliflower. Needless to say, I won't be making it again.

It was definitely different so if it sounds good to you than try it out. I mean seriously, when was the last time you had cauliflower soup?


Saturday, November 27, 2010

Chicken Cacciatore

Tonight I was The Pioneer Woman for 2 hours happily cooking in my kitchen. We can all pretend, right? I just love that lady and she has some of the best recipes!

Some evenings I am in the mood to cook up something quick and easy, but tonight I was in the mood to spend a little more time in the kitchen so I tried PW's Chicken Cacciatore. What a wonderful dinner it made! The dish was just full of flavor and the chicken was so tender. Two thumbs up for this recipe!


Chicken Cacciatore
Source: The Pioneer Woman

1 lb Pasta or Egg Noodles
8 whole Chicken Thighs, Skin On
Salt And Freshly Ground Black Pepper, To Taste
½ c. Flour
4 T. Olive Oil
2 T. Butter
1 whole Medium Onion, Halved And Sliced
2 whole Red Bell Peppers, Cored And Sliced (not too thin)
2 whole Green Bell Peppers, Cored And Sliced (not too thin)
5 cloves Garlic, Diced
12 oz. fresh Mushrooms, Sliced
½ t. Ground Thyme
¼ t. Turmeric
½ t. Kosher Salt
Red Pepper Flakes, Crushed, To Taste (optional)
¾ c. Dry White Wine
1 can (28 oz.) Whole Or Diced Tomatoes (with Their Juice)
Chopped Flat Leaf Parsley
Parmesan Cheese, For Sprinkling

Preheat oven to 350 degrees (F).

Cook pasta according to package directions. Do not overcook! Drain and set aside.

Salt and pepper both sides of the pieces of chicken. Dredge chicken in flour. Heat olive oil and butter in a heavy skillet or Dutch oven on the stovetop over medium-high heat. Place chicken skin down in pan, four pieces at a time. Brown chicken on both sides, then remove to a clean plate. Repeat with remaining chicken. Pour off half the fat in the pan and discard.

Add sliced onions and peppers, as well as the garlic. Stir around for 1 minute. Add mushrooms and stir around for 1 minute. Add thyme, turmeric, and salt. (And crushed red pepper flakes if you like things a little spicy.) Add extra black pepper to taste. Stir, then pour in wine. Allow to bubble.

Pour in canned tomatoes and stir to combine. Add chicken back into the pan, skin side up, without totally submerging the chicken. Place lid on the pot and put it into the oven for 45 minutes. Remove lid and increase heat to 375 degrees. Cook for an additional 15 minutes.

Remove pan from the oven. Remove chicken from the pot and place it on a plate. Remove vegetables from pot and place them on a plate. Return pot to burner and turn heat to medium high. Cook and reduce sauce for a couple of minutes.

Pour cooked, drained noodles on a large platter or in a big serving bowl. Add vegetables all over the top, then place chicken pieces on top of the vegetables. Spoon juices from the pot over the chicken and pasta (amount to taste.)

Before serving, sprinkle on chopped fresh parsley and grated Parmesan.

Friday, November 26, 2010

Turkey Poll Results

Thanks to everyone for voting for their favorite turkey!

The winner is..............


..........the Oreo Turkey! (That was my favorite as well!)

I hope everyone enjoyed Turkey Week and had a blessed Thanksgiving Day!

Thursday, November 25, 2010

Marshmallow Pilgram Hats


I hope everyone has a wonderful Thanksgiving! I have so much to be thankful for this year, including all of you. Thank you for being my fan club, for leaving me sweet comments and inspiring messages. Thank you for motivating me to keep on blogging!

Here's one last cute Thanksgiving cookie recipe for you just in time for the holiday! Enjoy your time with family and friends and happy eating!!!!

Mashmallow Pilgram Hats
Source: Family Fun

24 chocolate-striped shortbread cookies
12 oz. pkg. of chocolate chips
24 large marshmallows
tube of yellow decorators' frosting

Set the chocolate-striped cookies stripes down on a wax-paper-covered tray, spacing them well apart. Melt the chocolate chips in a microwave or double boiler. One at a time, stick a wooden toothpick into a marshmallow, dip the marshmallow into the melted chocolate, and promptly center it atop a cookie. Using a second toothpick to lightly hold down the marshmallow, carefully pull out the first toothpick. Chill the hats until the chocolate sets, then pipe a yellow decorators' frosting buckle on the front of each hat.

Tuesday, November 23, 2010

Pumpkin Fluff


A couple weeks ago I was talking to several of my friends and we were all sharing our love of pumpkin. Diana shared this yummy recipe with me. It was so easy to make and a delicious pumpkin dessert to snack on. I served it on graham crackers but it also goes well with cinnamon pita chips.

Pumpkin Fluff
Source: Diana B.

15 oz. can of pumpkin
5 oz. box of vanilla pudding mix
8 oz. Cool Whip (thawed)
1 t. pumpkin pie spice

Mix it all together and serve with Graham crackers or cinnamon pita chips.

Saturday, November 20, 2010

Turkey Week Conclusion


Well...that concludes Turkey Week! I hope you guys enjoyed it as much as I did. I had a blast (and some good laughs too) while making all these turkeys. Now I'm interested in hearing back from you. Let me know which turkey cookie you like the most by answering the poll on the right.

Turkey #1 - Sugar Turkey
Turkey #2 - Oreo Turkey
Turkey #3 - Striped Turkey
Turkey #4 - Chocolate Turkey
or
Turkey #5 - Gobble Gobble Turkey with Legs

Friday, November 19, 2010

Turkey #5


Check out these super cute turkeys!! And they even have legs!!! Wouldn't these be perfect to send with your kid to share at school or to serve at your family's Thanksgiving dinner? Some people will think these little guys are just too cute to eat!

Turkey #5 - Gobble Gobble Turkey with Feet
Source: Cookies and Cups

Double Stuff Oreos
Pretzel sticks
Chocolate covered marshmallows (New from Kraft!)
White decorating icing
Black and red decorating icing
Candy Corn

Take your Double Stuff Oreos and break your pretzel sticks into small pieces, about an inch, and push them gently into the bottom of the Oreo, like legs. Press 5 candy corn in the top, like feathers. Next take some white decorating icing and put a squirt in the middle to work as glue to hold your turkey's head on. Press a chocolate marshmallow or Whopper on to this. Now you have a head! Then dot on some white icing for eyes and then use your gel or sprinkle to give your eye a black center. Squeeze a little icing on to attach the beak. (For the beak cut off the top (white) part of a candy corn and color it orange with a food marker if you have one.) Then squeeze on some red for his gobble. Let it dry, so the head doesn't fall off and you're done! Super cute!

Thursday, November 18, 2010

Turkey #4


This turkey is related to Turkey #1 (aka The Sugar Turkey) but is covered with chocolate icing. All you chocoholics out there will love this turkey!

Turkey #4 - Chocolate Turkey
Source: Betty Crocker

1 pouch (1 lb 1.5 oz) Betty Crocker® sugar cookie mix
1/2 c. butter or margarine, softened
1 egg
1 container (12 oz) chocolate frosting
Candy corn
1 tube yellow decorating icing (I used red.)
Mini M&M's
1 tube black decorating gel

Heat oven to 375°F. In medium bowl, stir cookie mix, butter and egg until soft dough forms. On ungreased cookie sheets, drop dough by rounded tablespoonfuls 2 inches apart.

Bake 11 to 14 minutes or until edges are light golden brown. Cool 1 minute; remove from cookie sheets to cooling racks. Cool completely, about 15 minutes.

Frost and decorate 1 cookie at a time. After spreading frosting on cookie, add candy corn for feathers. Pipe yellow icing for beak and feet. Add M&M's for eyes; pipe black gel for center of each eye.

Wednesday, November 17, 2010

Turkey #3


These turkeys are going for the simplistic look. Great for holiday parties and fun to make with your kids. These are so cute everyone will want to GOBBLE them up!

Turkey #3 - Striped Turkey
Source: Oodlekadoodle Primatives

40 fudge-striped cookies
1/4 c. chocolate frosting
2 packages (5 oz. each) chocolate-covered cherries
20 pieces candy corn

Place 20 cookies on a flat surface, solid chocolate side down. With frosting attach a chocolate-covered cherry to the top of each base cookie. Position another cookie perpendicular to each base cookie; attach with frosting.

With a dab of frosting, attach one piece of candy corn to the front of each cherry for the head. Let stand until set.

Tuesday, November 16, 2010

Turkey #2


This turkey is made up of several favorites of mine: Oreos, a whopper, and a miniature Reese's peanut butter cup! Gobble, Gobble!!!

Turkey #2 - Oreo Turkey
Source: Oodlekadoodle Primitives

7 - 9 Candy Corn
2 Double Stuffed Oreo Cookies
1 Whopper
1 Miniature Reese's Peanut Butter Cup
black piping gel
white icing
Yellow and red food coloring

DIRECTIONS:
Put your Peanut Butter Cups in the fridge to cool. If you have cold hard chocolate to work with it makes it a lot easier.

Squeeze some of the white icing into a bowl. This will be your orange. Mix red and yellow food coloring with the icing to create your desired orange. Then put that into a plastic bag and set it aside for later.

Creating:
First you will be creating the tail using 1 Oreo cookie and 6 Candy Corns. Gently, with one candy corn, pull apart just one side of the Oreo don't break! . Put a good amount of icing in between the two sides. This will help the Candy Corn stay. Place 6 Candy Corn (white side down) in between the cookie.

Take your white icing and squeeze a generous amount onto the top back of an Oreo cookie. Take the other Oreo and put the bottom into the icing to have it stand up. If it doesn't stand, add more icing! Once you have it stand put it up against something so it doesn't fall until the icing is dry.

Remove your Peanut Butter Cup from the fridge. Take your knife and cut off the very bottom so you have a flat surface. Put icing on the bottom of it. Bump it up against the bottom and back of your Oreo cookies.

Next take your Whopper and squeeze more icing on it on one side. Place the whopper on top of the Peanut Butter Cup to make your head.

Find a piece of Candy Corn that has a nice big white end. Using your sharp knife cut the color off leaving you with the white end. Place some icing on it and stick it on your whopper as the beak to your Oreo Turkey. Hold for a moment.

If you want wings on your turkey add two candy corns to the sides.

Take your icing and place two white dots as eyes. Get your tube of black piping gel and place a black dot on each eye to make them come alive.

Grab your bag of already created orange. Cut a very small hold in the corner of the bag. Pipe the feet.

- - - - - - - - - -

With Wings...


Or Without Wings...


I personally love the wings!!!

Monday, November 15, 2010

Turkey Week!

Thanksgiving is only 10 days away so I am declaring this as Turkey Week on my blog! This week I am going to post a different turkey cookie recipe each day and at the end of the week you can vote which one is your favorite.

Turkey #1 is one that I made a couple years ago at a MOMS Club function. Just bake and decorate some pre-made sugar cookie dough and voila you have a cute turkey to serve at your upcoming Thanksgiving dinner.


Turkey #1 - The Sugar Turkey
Source: Pillsbury

1 roll (16.5 oz) Pillsbury® refrigerated sugar cookies
1 container (16 oz) chocolate creamy frosting
Candy corn
Orange decorating icing (I only had red.)
Black decorating gel
Mini M&M's

Heat oven to 350°F. Bake cookies as directed on roll. Cool completely, about 20 minutes.

Spoon chocolate frosting into resealable food-storage plastic bag; seal bag. Cut small hole in bottom corner of bag. On each cookie, pipe frosting on outer edge of half of cookie. Arrange candy corn over frosting for feathers.

Pipe orange icing onto each cookie to resemble turkey face and feet. Use orange icing to attach baking bits to turkey face for eyes. Pipe black gel on baking bits for centers of eyes.

Saturday, November 13, 2010

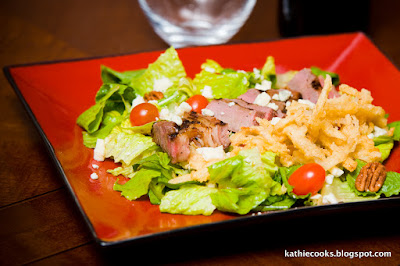
Big Steak Salad


I was in the mood for a big 'ole salad last night but I knew there was only one way my husband would eat a salad for dinner and not be disappointed - if there was a big juicy steak on top! He's never been a fan of vegetarian meals and insists that all meals must have some sort of meat in them. :)

This salad was amazing!!! Something you would order at a fancy restaurant. I followed The Pioneer Woman's recipe step by step except for when it came to the candied pecan bits. I tried that step twice and failed both times! The first time my thermometer never got past 250 degrees so I kept cooking and stirring the sugar until it became as hard as a rock (literally)!!! Not sure if my thermometer is broken or what so the second time I just cooked it using the time estimate that PW gives. Strike 2! First of all it never turned dark and clear amber in color (I wonder if she used brown sugar) and when I poured the mixture on top of the pecans it was just a huge clump of sugar on top. It was pretty disgusting so I threw that attempt out and served our salad with plain pecans. Oh well! It was still delicious! The onion straws and juicy steak put this salad over the edge and I would definitely rate it 10 out of 10 with or without the candied pecans.


Big Steak Salad
Source: The Pioneer Woman

2 whole Rib-eye Or Strip Steaks, Extra Fat Trimmed
_____
FOR THE DRESSING/MARINADE:
¾ c. Canola Oil
3 T. Red Wine Vinegar
1 T. Balsamic Vinegar
1 T. Worcestershire Sauce
2 T. Soy Sauce
1 t. (additional) Soy Sauce
2 T. Lime Juice
2 T. Sugar
3 cloves Garlic, Peeled
1 T. Minced Fresh Ginger
½ t. Hot Chili Oil
1 t. Kosher Salt
Lots Of Freshly Ground Black Pepper
_____
FOR THE ONION STRINGS:
2 whole Onions, Sliced As Thin As Possible
2 c. Buttermilk
2 c. Flour
1 T. Salt
½ t. Cayenne Pepper
1 quart Canola Oil
Black Pepper To Taste
_____
FOR THE CANDIED PECAN BITS:
½ c. Pecans, Chopped
1 c. Sugar
2 T. Water
_____
FOR THE SALAD:
Lettuce Mix: Romaine, Arugula, Watercress, Raddiccio, Etc.
Small Grape Tomatoes
¾ c. Crumbled Blue Cheese

To make the dressing/marinade, combine all ingredients in a mason jar with the lid. Shake vigorously to combine; taste and adjust seasonings to taste.

Place steak in a plastic zipper bag. Pour in half the marinade and seal. Refrigerate and marinate for at least two hours.

Prepare the onion strings: Slice onion very thin. Place in a baking dish and cover with buttermilk and soak for at least an hour.

Make the candied pecans: Spread pecans on a baking mat or sheet of waxed paper. Add sugar and water to a small saucepan or skillet over medium heat. Cook to 280 degrees, or until dark and clear amber in color, about 5 to 6 minutes. Pour mixture over pecans (may not need all of mixture) and quickly stir/poke with a fork to evenly distribute mixture all over pecans. Allow to cool completely.

Make the onion strings: Combine dry ingredients and set aside. Heat oil to 375 degrees. Grab a handful of onions, throw into the flour mixture, tap to shake off excess, and PLUNGE into hot oil. Fry for a few minutes and remove to a paper towel-lined plate as soon as they are golden brown. Repeat until onions are gone.

Grill (or sautee) the steak over medium-high heat until medium rare, about 2 minutes on each side. Remove from heat and allow to rest. Slice steak against the grain in thin slices.

In a large bowl, add lettuce mix, blue cheese, and cherry tomatoes. Add a little dressing and toss to combine. Add more if needed. Add candied pecans at the end and toss to combine.

Heap salad on a plate, making sure to get plenty of blue cheese, tomatoes, and pecans on each plate. Add half a steak to the top of each plate, then top the steak with onion strings.

Serve immediately.

Thursday, November 11, 2010

Catalina Salmon


I don't cook a lot of seafood around my house except for the occasional fish dish. This was my first attempt at baking salmon and my expectations were pretty low for this recipe. I couldn't imagine how good salmon could be by just putting some salad dressing and peppers on it but it was really good! The crunchy green peppers were such a nice compliment to the soft, flaky salmon. Great dish overall and so easy to make!

Catalina Salmon
Source: Kraft

4 salmon fillets (1-1/4 lb.)
1 - 2 green peppers, cut into thin strips
1/3 c. Kraft Free Catalina Dressing

Heat oven to 375°F. Place fish in 13x9-inch baking dish sprayed with cooking spray. Toss peppers with dressing; spoon over fish. Bake for 25 minutes or until fish flakes easily with fork.

Tuesday, November 9, 2010

Ballpark Nachos

This might not be the healthiest of dinners, but sometimes I like serving nachos! I saw this nacho cheese recipe online a long time ago. In fact, it's been so long that I can't remember where I saw it to give them the proper credit.

This recipe was great. You can serve them as just plain nachos and cheese...


or you can top them with all your favorite toppings! (Which is how I prefer!)


Ballpark Nachos

1 c. milk
4 t. cornstarch

1 T. diced fresh or canned jalapenos (optional)
Kosher salt to taste
1 t. chili powder or to taste
1 c. shredded Colby jack cheese

In a jar shake together milk and cornstarch. In a small sauce pan over medium heat, heat milk and cornstarch mixture, stirring constantly, until thickened and hot. It will get as thick as gravy. Remove from heat and add cheese, chopped jalapeno, chili powder, and salt to taste. Blend until cheese is melted.

Makes a little over 1 cup of nacho cheese. You can easily double this recipe if you have a large family.

Sunday, November 7, 2010

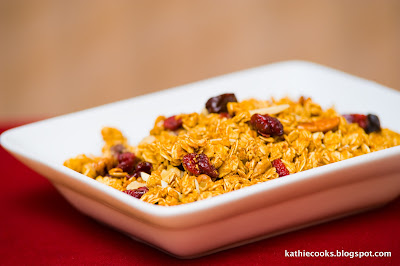
Pumpkin Granola


If you are a fan of granola than you will like this recipe! It made my house smell so good while it was baking and it tasted just as good! I have been snacking on it all day and even had it with some milk for breakfast this morning.

I read some of the comments that were posted on the Two Peas and Their Pod blog regarding this recipe. Some people said it was not as crunchy as they would have liked it to be so I ended up baking it about 5 minutes longer than the directions say. Also, the recipe calls for pepitas which are green raw pumpkin seeds. I've never had a pepita before so I just stuck with almond slivers, walnuts, and pecans. In addition to the dried cranberries, I also added dried cherries and blueberries.

This recipe was delicious!

Pumpkin Granola
Source: www.twopeasandtheirpod.com

5 c. rolled oats
1 t. pumpkin pie spice
1 t. cinnamon
1/4 t. nutmeg
¾ t. salt
¾ c. brown sugar
½ c. pumpkin puree
¼ c. applesauce
¼ c. maple syrup
1 t. vanilla extract
3/4 c. dried cranberries
1/2 c. pepitas ***see note

1. Preheat the oven to 325° F. Line a large baking sheet with parchment paper and set aside.

2. In a large bowl, combine oats, spices, and salt. Mix well.

3. In a medium bowl, whisk together brown sugar, pumpkin puree, applesauce, maple syrup and vanilla extract. Whisk until smooth. Pour wet ingredients into oat mixture and stir until the oats are evenly coated. They will be moist. Evenly spread the mixture onto the prepared baking sheet.

4. Bake for 20 minutes. Remove pan from the oven and stir. Bake for an additional 15-20 minutes or until the granola is golden and crisp. Remove from the oven and stir in dried cranberries and pepitas. Let cool completely. Store in an airtight container.

Note: You can use almonds, walnuts, pecans, or sunflower seeds in place of the pepitas.

Friday, November 5, 2010

Minestrone Stew

Here's another good soup recipe for you. This tasted fantastic after working in the yard all afternoon! A great way to warm up after a cool fall day.

I adjusted the recipe by adding 2 c. of vegetable juice. I wanted it to be a little more soupy and it turned out great!


Minestrone Stew
Source: Taste of Home Family Collection

1 lb. ground beef
1 small onion, chopped
1 can (19 oz.) ready-to-serve minestrone soup
1 can (15 oz.) pinto beans, rinsed and drained
1 can (14 1/2 oz.) stewed tomatoes
1 can (11 oz.) whole kernel corn, drained
1 can (4 oz.) chopped green chilis
1 t. salt
1/2 t. garlic powder
1/2 t. onion powder
2 c. vegetable juice (optional)

In a skillet, cook beef and onion over medium heat until meat is no longer pink; drain. Transfer to a slow cooker. Add the remaining ingredients; mix well. Cover and cook on low for 4-6 hours or until heated through.

Wednesday, November 3, 2010

Pumpkin Cream Cheese Muffins


My favorite part about Fall is when all the leaves turn their bright yellow, orange, and red colors. My second favorite thing about Fall is PUMPKIN! I cook with a lot of pumpkin and cinnamon this time of year and it makes the house smell so good!

These muffins were wonderful! Thank goodness because it made 24 of them! My whole family loved these. My 3 year old said, "Mommy, these are delicious!" and my husband was pleasantly surprised with the cream cheese filling. These muffins remind me of pumpkin roll. I will definitely be making these again!

Pumpkin Cream Cheese Muffins
Source: Annie's Eats

For the filling:
8 oz. cream cheese, softened
1 c. confectioners’ sugar

For the muffins:
3 c. flour
1 t. ground cinnamon
1 t. ground nutmeg
1 t. ground cloves
1 T. plus 1 t. pumpkin pie spice
1 t. salt
1 t. baking soda
4 large eggs
2 c. sugar
2 c. pumpkin puree
1¼ c. vegetable oil

For the topping:
½ c. sugar
5 T. flour
1½ t. ground cinnamon
4 T. cold unsalted butter, cut into pieces

To prepare the filling, combine the cream cheese and confectioners’ sugar in a medium bowl and mix well until blended and smooth. Transfer the mixture to a piece of plastic wrap and shape into a log about 1½-inches in diameter. Smooth the plastic wrap tightly around the log, and reinforce with a piece of foil. Transfer to the freezer and chill until at least slightly firm, at least 2 hours.

To make the muffins, preheat the oven to 350˚ F. Line muffin pans with paper liners. In a medium bowl, combine the flour, cinnamon, nutmeg, cloves, pumpkin pie spice, salt and baking soda; whisk to blend. In the bowl of an electric mixer combine the eggs, sugar, pumpkin puree and oil. Mix on medium-low speed until blended. With the mixer on low speed, add in the dry ingredients, mixing just until incorporated.

To make the topping, combine the sugar, flour and cinnamon in a small bowl; whisk to blend. Add in the butter pieces and cut into the dry ingredients with a pastry blender or two forks until the mixture is coarse and crumbly. Transfer to the refrigerator until ready to use.

To assemble the muffins, fill each muffin well with a small amount of batter, just enough to cover the bottom of the liner (1-2 tablespoons). Slice the log of cream cheese filling into 24 equal pieces. Place a slice of the cream cheese mixture into each muffin well. Divide the remaining batter among the muffin cups, placing on top of the cream cheese to cover completely. Sprinkle a small amount of the topping mixture over each of the muffin wells.

Bake for 20-25 minutes. Transfer to a wire rack and let cool completely before serving.

Monday, November 1, 2010

Frita Cubana

Here's that 3rd Cuban recipe I mentioned in a previous post. Wow! These burgers were so full of flavor! They were really good and unlike any hamburger I've ever had. I was afraid they would taste really greasy, since the recipe calls for you to fry them in oil but they really weren't. I made sure to pat them with a paper towel when they were done and the outcome was a crispy, delicious burger.

I did sway from the recipe at the very end. It calls for you to make 4 patties (out of the 2 pounds of meat!!!). I thought those would be way too big so I made 8 smaller patties and served them on these cute little slider buns I found at the grocery store. I served our Frita Cubanas with chips and apple slices from our trip to the orchard the day before.


Frita Cubana
Also Known As the Cuban Hamburger
Source: In a Cuban Kitchen by Alex Garcia

1 lb. ground beef
1 lb. ground pork
1/2 white onion, grated
2 garlic cloves, crushed
2 T. paprika
1/2 t. ground cumin
1 t. dried oregano
2 t. salt
Vegetable oil, for frying
4 Kaiser or white bread rolls, cut in half
2 med. tomatoes, but into 8 slices
1 sm. red onion, cut into 8 thin slices
French fries for serving (optional)
4 T. yellow deli mustard (optional)

In a mixing bowl, thoroughly mix the beef, pork, onion, garlic, paprika, cumin, oregano, and salt. Divide the meat equally to make 4 patties, and refrigerate for 1 hour.

Heat 3/4 inch of oil in a skillet. Pan-fry the patties, turning once, until cooked through, for about 4 minutes per side.

To assemble each hamburger, place a patty on the bottom half of a roll and top with a tomato slice, an onion slice, and serve with French fries. Spread 1 T. of mustard on the inside of the top half of the roll and place over the patty to close.

Sunday, October 31, 2010

Happy Halloween!


Happy Halloween from my little munchkins to yours!