Thursday, September 30, 2010

Hi Hat Cupcakes


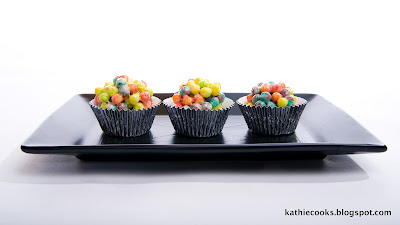
I saw these cupcakes on Bakerella's website and I was intrigued! They looked so rich and so chocolately that I knew I wanted to make (EAT) them!

I am always very honest on this blog and must admit something right off the bat - I will never make these again. Ever! They took me about 3 hours from start to finish and 1/2 the cupcakes didn't even turn out so I had to make an additional batch of cupcakes from a box mix so that I'd have enough cupcakes to ice. I overfilled the cupcakes a little too much so the tops overflowed and got stuck onto the pan. I tried to use a knife to loosen the tops (like the directions said) however, the edges crumbled off leaving a very unpleasant looking cupcake.

The instructions also call for you to beat the frosting with a hand held mixer for 12 minutes. I don't know about you, but that is a long time and by the time I was done making these cupcakes I was tired!

Luckily the ones that did turn out were really good and pretty cute too. My hubby's co-workers enjoyed them. I will mark this down in my book as a good baking experience but I will never make these again.


Here's a picture of the inside.

Did I mention that I will NEVER make these again?!?!? :)

Hi Hat Cupcakes
Source: www.bakerella.com and www.MarthaStewart.com

FOR THE BATTER
3 oz. unsweetened chocolate, chopped
1 c. flour
1/2 t. baking powder
1/2 t. baking soda
1/4 t. salt
1/2 c. (1 stick) unsalted butter, softened
1 1/4 c. sugar
2 large eggs
1 t. vanilla extract
1/2 c. sour cream

FOR THE FROSTING
1 3/4 c. sugar
3 large egg whites
1/4 t. cream of tartar
1 t. vanilla extract
1/2 t. almond extract

FOR THE CHOCOLATE COATING
2 c. chopped (about 12 ounces) semisweet chocolate
3 T. canola or vegetable oil

Preheat oven to 350 degrees with rack in center. Prepare the batter: Place chocolate in a medium heatproof bowl, and set it over a medium saucepan of barely simmering water; stir chocolate until melted and smooth. Remove bowl from heat, and set aside to cool slightly.

Meanwhile, whisk together flour, baking powder, baking soda, and salt in a medium bowl; set aside.

In the bowl of an electric mixer fitted with the paddle attachment, cream butter and sugar on medium speed, scraping sides of bowl as needed, until light and fluffy. On low speed, mix in melted chocolate. Increase speed to medium, and add eggs, one at a time, mixing well after each addition. Add vanilla, and beat until mixture is creamy and color has lightened slightly, about 1 minute. Mix in sour cream. On low speed, add half of reserved flour mixture, beating until just incorporated. Mix in 1/2 cup water. Add remaining flour mixture, and mix until just incorporated.

Line a cupcake pan with paper liners. Fill each liner with enough batter to come 1/8 inch from top, about 1/3 cup. Bake, rotating pans halfway through, until tops are firm and a cake tester inserted in the center comes out clean, about 20 minutes. Transfer cupcakes to a wire rack to cool in pan for 10 minutes.

Use a small knife to loosen any tops stuck to the pan. Carefully invert cupcakes onto the wire rack. Turn cupcakes right side up, and let cool completely.

Prepare the frosting: In a large heatproof bowl, combine sugar, 1/4 cup water, egg whites, and cream of tartar. Using a handheld electric mixer, beat on high speed until foamy, about 1 minute. Set bowl over a pan of barely simmering water. Beat on high speed until frosting forms stiff peaks, about 12 minutes; frosting should register 160 degrees.on a candy thermometer. Remove from heat; stir in vanilla and almond extracts, and beat for 2 minutes more until frosting thickens.

Transfer frosting to a large pastry bag fitted with a 1/2-inch plain pastry tip. Leaving a 1/8-inch border on each cupcake, pipe a spiral of frosting into a 2-inch-high cone shape, using about 1/2 cup of frosting per cupcake. Transfer cupcakes to a baking sheet, and refrigerate while preparing the chocolate coating.

Prepare the chocolate coating: Combine chocolate and oil in a medium heat-proof bowl set over a medium saucepan of barely simmering water; stir until melted and smooth. Transfer to a small bowl, and let cool about 15 minutes.
Holding each cupcake by its bottom, dip cupcake in the chocolate to coat frosting, allowing excess to drip off. Transfer to a baking sheet fitted with a wire rack. Spoon more coating around edge of cupcake and any exposed frosting; none of the frosting should show.

Place cupcakes on a serving platter, and refrigerate for 30 minutes to let coating set. Cover, and refrigerate for 2 hours more. Serve cold. Cupcakes can be refrigerated for up to 3 days.

Wednesday, September 29, 2010

Trix Cereal Treats


Here's a little twist using the standard Rice Krispie Treat recipe, using Trix cereal instead. (I didn't notice it until I got home from the grocery store but this was a special box of Trix called Fruitalicious Swirls.) These are so fun and colorful. Kids love them and they would be great to make for birthday parties!

I even tried half the recipe with Cocoa Puffs so I could get my chocolate fix for the day.


Trix Cereal Treats
Source: Adapted Rice Krispie Treat recipe


3 T. butter or margarine
1 10 oz. package regular marshmallows OR 4 c. miniature marshmallows
6 cups Trix

In large saucepan melt butter over low heat. Add marshmallows and stir until completely melted. Remove from heat.

Add cereal. Stir until well coated.

Next you'll want to grease your hands with a little butter or spray lightly with Pam. Grab a handful of cereal and gently roll into a ball. (Careful because the cereal mixture is still a little hot.)

Place the cereal balls into cupcake liners and enjoy!

Monday, September 27, 2010

Iced Green Tea Latte


I've been using up a Starbuck's gift card over the last few weeks and have since then become addicted to their Iced Green Tea Lattes. It felt like I won the lottery the other day when I went through their drivethru, ordered a Grande Iced Green Tea Latte, and they accidentally made me a VERDE (the largest drink they make)! I sipped on it all morning long. It was so good!

Like the saying goes, all good things must come to an end and my gift card eventually ran out. No more free Iced Green Tea Lattes for me. :( I continually found my car gravitating towards the Starbuck's drive thru to order another one of my favorite drinks. It was my way of starting off a busy day or treating myself after a long day.

After chatting with my husband one night, we decided to "Google" Iced Green Tea Latte. There had to be a way I could make these fabulous drinks for a fraction of the price. Well, after finding this website and adjusting the recipe just 2 times, I have found a concoction that is oh so close to the actual Starbuck's drink!

The hardest part was finding the Matcha Green Tea powder. I ordered it on Amazon and it arrived at my door 3 days later! Here's the link if you are interested in ordering some:
http://www.amazon.com/Matcha-Green-Tea-Powder

I was so excited about how good this iced green tea latte was that I made my hubby do a Taste Test! He stopped by Starbuck's on his way home from work one night to pick up their drink while I was at home making my own. I poured each drink into a red plastic cup with a straw and made him close his eyes to taste. His first response, "Wow! These are really close. Both of them are good!" He was able to distinguish mine saying that it was a little more sweet and the green tea flavor was a bit stronger. But the conclusion is...I can now make a really good Iced Green Tea Latte and save $ not only on the drink but also on the gas it took me to drive to Starbuck's! :)

Iced Green Tea Latte
Source: www.ehow.com

Place 1/2 cup of water into a microwave safe glass bowl and heat until just below the boiling point. (About 1 or 1 1/2 minutes.)

Add two teaspoons Matcha green tea powder to the hot water and whisk thoroughly to dissolve.

Add 2 - 3 T. sugar (more or less depending on your desired level of sweetness) and stir to dissolve.

Set aside and let cool for a few minutes.

Fill a glass with ice and pour the green tea mixture over ice.


Add a 1/2 cup of 2% milk and stir. (I normally use skim; however, I used 2% for the taste test because that's what they use at Starbuck's.)


Insert straw and enjoy!

Saturday, September 25, 2010

Homemade Bagels


Tonight I marked another item off of my "Things I Want to Make for the 1st Time" list. BAGELS!

I love bagels and ate quite of few of them when we lived on the east coast. Making bagels has always sounded like such a tedious task that I kept putting it off. Little did I know...they aren't hard at all to make!

I didn't decide to make them until about 9:30pm tonight so at 11:00pm I was taste testing because there was no way I could wait until breakfast tomorrow morning! They were fun to make and even more fun to eat! Yumm-O! This recipe makes 8 bagels and you can use any kind of toppings you like. I made 2 everything bagels (my favorite!!!), 2 garlic bagels, 1 sesame seed bagel, 1 plain bagel, and 2 cinnamon sugar bagels. I had to eat one of the everything bagels for my midnight snack tonight. Not sure what kind I'll have for breakfast in the morning. They all look so good!

Homemade Bagels
Source: Wholesome Mommy


4 c. bread flour
1 T. sugar
1 1/2 t. salt
1 T. vegetable oil
2 t. instant yeast
1 1/4 – 1 1/2 c. of warm water

Put all the ingredients in a bowl and mix. {You can mix these on the dough setting of your bread machine, or mix them in a stand mixer, or do it by hand}. The dough should be stiff, but add the extra water if it is REALLY stiff or you can’t get all the flour incorporated.

Put the dough on the counter and knead for about 10 minutes, or until the dough is uniform and smooth. {If you are using the dough setting on your bread machine it will do this for you. If you are using a stand mixer with a dough hook, it will do this for you too!}.

Cut the dough into 8 equal sized balls (These will make nice BIG bagels like you would get at a bakery.) Let it rest for 10 to 15 minutes.

Now, take each of the dough balls and using two hands, roll it into a little snake on the counter. When the snake is longer than the width of your two hands, wrap around your dominant hand. The dough rope should be wrapped so the overlapping ends are together at your palm, near the start of your fingers. Now take the two overlapping ends, and use your palm to squish/roll these two end together. Once the dough is fused, you should have a perfectly circular bagel. It will look very similar to this when it is cooked. It won’t really change much. Getting a perfect circle will take a little practice, but even if they don’t look beautiful on your first {second or third} try, they will taste delicious!

Let your bagels rest on the counter for about 20 minutes and bring a pot of water up to a boil. Grease a large baking sheet {or 2}. You can just rub a light splash of vegetable oil around. Preheat your oven to 425.

After 20 minutes, it is time to get them boiling! Add them to the boiling water as many as you can without crowding them. They will float on the top of the water. Boil for 1 minute and then flip! Boil for 1 more minute and then take them out to dry for a minute before you place them on your baking sheet.

Once all the bagels are boiled put the baking sheet in the oven and bake for 10 minutes. Then, flip the bagels and bake for another 10 minutes. Take them out and place them on a rack to cool for at least 20 minutes. (If you can possibly wait this long!)

Note: You can add toppings to these. Just have the topping (such as sesame seeds, poppy seeds, cinnamon sugar, etc) in a plate and when the bagels come out of the boiling water place them face down into the toppings. Then, add to the baking sheet. Bake and flip just like you would the plain ones.

Wednesday, September 22, 2010

Dirt Pudding


My sister made this while we were back home visiting this weekend. What a great dessert! She adjusted the recipe a little bit to make it even that much better....chocolate pudding instead of vanilla! She also used the orange Halloween Oreos that are in stores right now. The kids got a kick out of the orange and black "dirt"! How fun!!!

Dirt Pudding
Source: Becky M. via the First Baptist Church cookbook

Crushed Oreos
1/2 stick butter
8 oz. cream cheese
1 c. powdered sugar
3 c. milk
1 lg. Cool Whip
2 pkgs. instant vanilla pudding

Put most of the Oreo cookie crumbs in the bottom of a 9 x 13 inch pan. Cream together butter, cream cheese, and powdered sugar. Mix the pudding and milk together and add to the above. Fold in Cool Whip. Pour mixture on top of crumbs. Sprinkle the remaining Oreos on top. Chill.

Monday, September 20, 2010

Easy Cheesy Buffalo Chicken Dip

Here's another recipe that my friend, Barbie, shared with me. It's a Kraft recipe but B always has a way of finding all these fabulous recipes.

This is one of my hubby's favorite appetizers. It's so easy to whip together if you have unexpected company that stops by. Use mild buffalo sauce if you don't want it too spicy or use hot buffalo sauce if you are more daring!


Easy Cheesy Buffalo Chicken Dip
Source: Kraft

8 oz. pkg. cream cheese, cubed
1 1/2 c. finely chopped cooked chicken
1/2 c. blue cheese dressing
1/2 c. buffalo wing sauce
2 stalks celery, finely chopped

Mix all ingredients in medium microwaveable bowl.

Microwave on high 5 minutes, or until cream cheese is melted and mixture is heated through, stirring after 3 minutes.

Serve hot with Wheat Thins crackers, tortilla chips or celery sticks.

*If you have extra time on your hands, you can bake it instead of using the microwave. Either way will taste great!

Saturday, September 18, 2010

Pretty Little Brownie Bites


Aren't these A.D.O.R.A.B.L.E!!!!

I check The Pioneer Woman's website every morning to see what her latest creation is. As soon as I saw these I wanted to make them. They just looked so fun!!!! The Pioneer Woman ranks right up there with Paula Deen on my list of favorite chefs.

Check out her website for step-by-step pictures of making these little brownie bites. You can use a box brownie mix if your time is limited. The best part is decorating! Drenching them in the chocolate sauce and then topping them with anything and everything you can find in your pantry. My 3 year old even got a kick out of helping me find things to top them with. I used M&M's, slivered almonds, halved pecans, graham cracker crumbs, a mini Oreo, butterscotch and chocolate chips, marshmallows, Whoppers, sprinkles, sugar, and even toasted sunflower seeds (that was Carson's idea)! Your options are endless!


Pretty Little Brownie Bites
Source: The Pioneer Woman

4 whole 1-oz. Squares Unsweetened Chocolate, Melted And Cooled
2 sticks Butter, Softened (but Not Room Temperature)
2 c. Sugar
4 whole Large Eggs
3 t. Vanilla Extract
1-¼ c. Flour
1 c. Milk Chocolate Chips
1 c. Semi-sweet Chocolate Chunks

ICING/GLAZE
8 whole 1-ounce Squares Semi-sweet Chocolate, Chopped
1 c. Cream, Heated
2 T. Light Corn Syrup
2 t. Vanilla Extract

Preheat oven to 325 degrees.

For brownies, melt 4 ounces chocolate and set aside for 15 to 30 minutes, allowing to cool. Chocolate should not be warm! Cream butter and sugar until fluffy. Beat in the eggs two at a time. With mixer on low, drizzle in cooled chocolate. Mix until just combined. Add flour and mix until just combined. Scrape sides and bottom of bowl and mix for five more seconds. Add chocolate chips and chocolate chunks and mix for just a few seconds on low, until they’re incorporated. Generously grease and flour mini-muffin pan. Scoop generous teaspoons of batter into each tin. (We don’t want the brownies to have muffin tops; try to get them to stay under the top of the tin.) Bake for 10 to 14 minutes, or until set. Remove pans and invert on a cooling rack. Allow brownie bites to cool completely.

To make the icing, mix cream with corn syrup and heat in a microwave safe container for 1 to 1 1/2 minutes. Add chopped chocolate to a separate bowl. Add vanilla to warm cream mixture, then pour over chopped chocolate. Stir until chocolate totally melts and mixture is smooth. Add brownie bites face down in the icing. Dunk to submerge, and spoon icing over the top to thoroughly coat. Remove with a fork, tapping the fork on the side of the bowl several times quickly in order to get the excess to drain between the tines. Carefully set on a baking mat or sheet of waxed paper.

Decorate as you wish! Chopped nuts, candies, sprinkles, sea salt…the world is your oyster!


*Make sure you don't fill the mini muffin tins too full. What we’re trying to avoid here is a big muffin top; you want the tops to remain below the surface of the tins.

Thursday, September 16, 2010

Zucchini Cookies


My mom shared this recipe with me the other day and now I am sharing it with all of you. This will probably be the last zucchini recipe I post this year.

These cookies are good but not super sweet and dense like the average cookie. They are light and fluffy. They almost taste like a piece of zucchini bread with chocolate chips, only in the shape of a cookie. Very fun to snack on.

Zucchini Cookies
Source: Mom

1/2 c. butter
3/4 c. sugar
1 egg
1/2 t. vanilla
1 1/2 c. flour
1 t. cinnamon
1/2 t. baking soda
1/2 t. salt
1 c. quaker oats
1 c. zucchini,peeled and shredded
1 c. chocolate chips

Combine all ingredients and drop by spoonful onto lightly greased cookie sheet. Bake for 15 minutes in a 350 degree oven.

Tuesday, September 14, 2010

Cheesy Zucchini

I went to my parents' house this past weekend. You know what that means......MORE ZUCCHINI!!!!

Zucchini and tomatoes are my favorite two vegetables in the world. I don't think I could ever eat too much of either one. So here's another zucchini recipe for you. It's another one of my grandma's recipes and makes a wonderful side dish.


Cheesy Zucchini
Source: Grandma H.

4 medium zucchinis, peeled and grated
1 t. salt
4 T. butter
1/4 c. green onions, thinly sliced (I didn't have any on hand, so I substituted a small yellow onion)
1 T. fresh basil (I used dried basil leaves)
1/2 c. Velveeta cheese

Grate 4 medium zucchinis. Sprinkle with 1 t. salt. Let stand 5 minutes. Drain, pressing out as much liquid as possible.
Heat 4 T. butter in skillet. Add 1/4 c. thinly sliced green onions. Cook and stir 1 minute. Add zucchini. Stir and cook until just tender, about 5 minutes. Quickly stir in 1 T. chopped fresh basil and 1/2 c. cubed Velveeta cheese.

Thursday, September 9, 2010

Chocolate Chip Blonde Brownies


Here's a really good dessert recipe that I made over Labor Day weekend. It's my aunt's recipe and I've made it many times.

*The recipe makes more brownies than what you see in the picture. After the picture was taken, I then added the 2nd layer of brownies on top. Plenty to go around! :)

Chocolate Chip Blonde Brownies
Source: Aunt Jenny

2/3 c. butter
2 c. brown sugar
2 eggs
2 t. vanilla
2 T. water
2 c. flour
1 t. baking powder
1/4 t. baking soda
1 t. salt
1 c. chocolate chips

Melt butter then add brown sugar. Mix together and let cool slightly. Add the eggs, vanilla, and water. In a separate bowl mix together dry ingredients (flour, baking powder, baking soda, and salt). Stir everything together and spread in a greased pan. Sprinkle chocolate chips on top. Bake at 350 degrees for 25-30 minutes.

Tuesday, September 7, 2010

Cucumber Tomato Salad

We took my brother-in-law and his family to see the Ann Arbor farmer's market. We ended up coming home with raspberries, cucumbers, sweet potatoes, and 3 different kinds of cherry tomatoes. My sister-in-law made this dish to go with our Churrasco Steak dinner and it was delicious (and healthy too)! There's nothing better than veggies that are grown fresh from our local farmers.

Notice the dark red cherry tomatoes. That was the first time I had ever seen anything like it. They, along with the traditional yellow and red cherry tomatoes were so good. I just love popping them straight into my mouth!


Tomato, Onion, and Cucumber Salad
Source: www.foodnetwork.com

5 medium plum tomatoes, halved lengthwise (We used cherry tomatoes)
1/4 red onion, peeled, halved lengthwise, and thinly sliced
1-2 cucumbers, halved lengthwise and thinly sliced
A generous drizzle of extra-virgin olive oil, about 2 T.
2 splashes red wine vinegar
Coarse salt and black pepper

Dress the tomatoes, onions, and cucumber with olive oil, red wine vinegar, salt, and pepper.

Let stand while you prepare dinner, about 20 minutes. Re-toss and serve salad with crusty bread for mopping up juices and oil.

Monday, September 6, 2010

Best Party Sangria Recipe

What a fun Labor Day Weekend it has been so far! My brother-in-law and his family are in town visiting us and I wanted to make my famous Churrasco Cubano Cuban Skirt Steak for them. What's the best drink to serve with a meal like this? SANGRIA!!! This recipe was fabulous. It got lots of compliments and my husband loves it!


Best Party Sangria Recipe
Source: www.wine.about.com

1 Bottle of red wine (Cabernet Sauvignon, Merlot, Rioja, Zinfandel, Shiraz)
1 Lemon cut into wedges
1 Orange cut into wedges
1 Lime cut into wedges
2 T. sugar
Splash of orange juice or lemonade
1 c. of raspberries or strawberries
1 small can of diced pineapples (with juice)
3 c. ginger ale
1 c. club soda

Pour wine into a large pitcher and squeeze the juice wedges from the lemon, orange and lime into the wine. Toss in the fruit wedges (leaving out seeds if possible) and pineapple then add sugar and orange juice. Chill overnight. Add ginger ale, club soda, berries and ice just before serving. If you'd like to serve right away, use chilled red wine and serve over lots of ice. However, remember that the best Sangrias are chilled around 24 hours in the frig. - allowing the flavors to really marinate into each other.

Here's a picture of the Sangria marinating before I added the ginger ale, club soda, and raspberries.