Sunday, March 14, 2010

Homemade Potato Chips


My brother-in-law sent me a link this morning on how to make homemade potato chips in the microwave! I was completely skeptical at first thinking there was no way that the microwave could produce crispy potato chips that would actually taste good. My husband was also very skeptical so he joined me in the kitchen for this cooking experiment.

We were pleasantly surprised how good they were! They were crispy and actually tasted like fresh potato chips! Even my 3 year old kept asking for more!

One batch in the microwave makes a snack size portion for one person. We ended up making 2 different batches - one with regular salt and pepper and the other batch with garlic salt. Both were yummy! This is definitely more of a fun kitchen project rather than a practical way to make a big batch of chips. (There's no way I would try making these for a large group of people.)

So if you have a potato laying around you should give this recipe a try! Grab the whole family because it's a fun experiment with an outcome that will promise to leave no crumbs behind!


Homemade Potato Chips

1 russet potato
Non stick spray
Parchment paper or glass plate
Salt and Pepper

Cut a piece of parchment paper to fit the inside of your microwave. Carefully slice 1/3 of a potato into paper thin slices using a mandoline, vegetable peeler, or sharp knife. You don’t want to cut any more than this because any extra slices laying around waiting to be cooked will turn pink in color. Completely coat the parchment paper with non-stick spray and place the potato slices in a single layer. Spray the potato slices with non stick spray and lightly sprinkle with salt and pepper.


Turn off the rotating option on your microwave and cook for 4-5 minutes. Cooking times will vary based on the strength and power of your microwave. Some chips may turn very dark brown. Ideally you want them light and golden. Repeat the process until you’ve used your entire potato.

*This fun idea came from www.savorysweetlife.com. Check out Alice's blog for lots of other great recipes!

Saturday, March 13, 2010

Buffalo Chicken Sandwiches for the Crockpot

Those of you who know us realize how much my hubby LOVES buffalo chicken wings and how much I LOVE using my crock pot for easy to prepare dinners! When I saw this recipe, I knew it was a Win-Win situation and just had to give it a try. It proved to be quite tasty and was given two thumbs up from my husband.

It was a little hard to taste the Ranch dressing mix so next time I would use a little more. Otherwise it's just as good if you drizzle some Ranch or Bleu Cheese dressing on top of the sandwich right before serving them.


Buffalo Chicken Sandwiches for the Crockpot
Source: A Recipe A Day

4 skinless and boneless chicken breasts
1 (17.5 oz) bottle buffalo wing sauce (I used Buffalo Wild Wing Sauce)
1/2 of a 1 oz. pkg of dry ranch salad dressing mix
6 sandwich or hoagie rolls

Put the chicken in the crockpot. Pour 3/4 of the bottle of the hot sauce over the top of the chicken and then sprinkle the salad dressing mix over that. Cover and cook on LOW for 6-7 hours.

Once the chicken has cooked, shred it right in the crockpot and let it continue to cook for a few minutes to soak up the sauce.

Pile chicken onto rolls and splash with some of the remaining wing sauce if desired. Cover with provolone cheese and stick under the broiler until the cheese melts.


Makes at least 6 sandwiches.

Friday, March 12, 2010

Sweet and Salty Butterscotch Candied Popcorn

I was searching for a snack that my family could munch on this evening while watching TV. I came across this yummy little treat on one of my favorite food blogs Picky Palate.


Sweet and Salty Butterscotch Candied Popcorn

1 3.3oz bag Kettle Corn popcorn, popped and all un-popped kernels removed
1 c. peanuts
1 c. butterscotch chips
6 T. butter
3/4 c. packed brown sugar
1/3 c. corn syrup
¼ t. salt

1. Preheat oven to 250 degrees F. Place popped popcorn and peanuts onto a large rimmed baking sheet that has been sprayed lightly with non stick cooking spray.

2. Place butterscotch chips, butter, brown sugar, corn syrup and salt into a medium saucepan over medium heat. Stir constantly until mixture comes to a light boil. Remove from heat and pour evenly over popcorn and nuts. Gently stir to coat mixture over popcorn. Bake in oven for 30 minutes, stirring every 15 minutes.

3. Remove from oven and pour onto parchment paper to cool. Break into pieces and serve. Enjoy!

Thursday, March 11, 2010

Freezer Meals - Updated

I am 8 months pregnant now and baby #2 will be here before we know it! One of the items on my "Before Baby Comes To-Do List" is to stock our deep freezer with lots of frozen meals. I love to cook, but I'm sure sleep will be #1 on my list right after the baby is born. I found a 30 pack of 9x13 inch aluminum pans at Costco the other day for $5.99 and I plan to fill most of them up before this baby gets here!

I also have many friends that are pregnant right now so I'm hoping they can benefit from this post as well!

I have completed 8 different Freezer Meal Recipes so far. The links to the recipes are below. This list will continue to grow over the next couple of weeks. Enjoy!

Mini Meat Loaves - DONE!

Spaghetti Casserole - DONE!

Pizza Pasta Bake - DONE!

Tator Tot Casserole - DONE!

The Best Chili Ever - DONE!

Ziplock Chicken - DONE!

Chicken Pot Pies - DONE!

Italian Lasagna - DONE!

Wednesday, March 10, 2010

Homemade Pizza


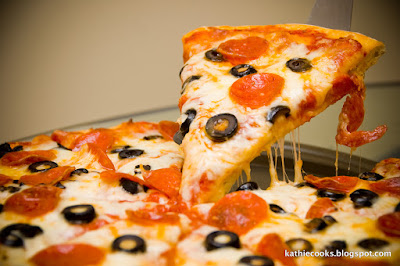
I have to admit this is the first time I have ever made my own pizza crust AND pizza sauce. This truly is a homemade pizza. I am usually all about convenience when it comes to making pizza at home and will buy a pre-made pizza crust and jar of pizza sauce from the grocery store. But not this time! I wanted to try making it all from scratch! The pizza sauce was whipped together in the blender and the crust was ready in a matter of minutes...much easier than I had ever imagined. Not only did it taste WONDERFUL but it also gave me such a sense of accomplishment making it all from scratch! I'm not sure I'll ever be able to buy the pre-made items again...


Pizza Sauce

1 (14 1/2 oz) can diced tomatoes
1 (6 oz.) can tomato paste
1/4 t. oregano
1/4 t. basil
1/4 t. black pepper
1/4 t. salt
1/8 t. garlic powder
1/8 t. onion powder
1 T. sugar

Place all ingredients in a blender and pulse until it reaches desired consistency.

- - - - - -


Fast and Easy Pizza Dough

3 c. flour, more or less
1 T. honey, heaping
1 T. oil, heaping
1 c. warm water
1 T. yeast
1 t.garlic salt

Preheat oven to 475 degrees. (If using a pizza stone, let stone heat for at least 30 minutes in the oven before baking pizza.) Mix all pizza dough ingredients together, except the flour. Add flour and knead for a bit then put into pan (or use a pizza stone). Top dough with sauce and toppings. If baking in a sheet pan, bake for about 12 minutes (checking often) until crust is browned and cheese is golden and bubbly. If baking on the preheated pizza stone, slide pizza onto stone and bake for about 8 minutes.

Makes 1 large pizza.


*Thanks to Real Mom Kitchen for these recipes! Here are the links to the recipes on her site:
Pizza Sauce
Fast and Easy Pizza Dough

Tuesday, March 9, 2010

The Sunshine Salad

Also know as...The Wedgie Salad Bar

This was a big hit at a BBQ we had this past weekend. I got the idea from Robin Sue at www.BigRedKitchen.com but put a new twist on it. With two wonderful helpers by my side, Trinity and Julia, we arranged the salad to look like the sun and gave it a new name - The Sunshine Salad! We drizzled the wedges with 3 different salad dressings and arranged all the toppings around the platter so that people could decorate their own salad to their liking. Both the adults and the kids had fun with this one!


The Sunshine Salad

1-2 heads iceberg lettuce, cored and cut into wedges (Use a plastic knife so the lettuce does not brown)
Dressings of your choice
1 pound crispy crumbled bacon
1 cucumber, chopped
6 hard boiled eggs, chopped (optional)
1-2 c. shredded cheese
2-3 tomatoes, chopped

Place lettuce wedges on a round platter and arrange wedges to look like the rays of the sun. Drizzle with your favorite salad dressing(s). Place a small bowl of shredded cheese in the center. Place all other ingredients in small bowls around the platter. Let your guests pick their own wedgies and toppings.

Monday, March 8, 2010

Snickerdoodle Muffins

The cinnamon and sugary goodness of snickerdoodle cookies always bring back such great childhood memories. They are definitely in my top 5 of favorite cookies.

Now let me introduce you to something just as good! SNICKERDOODLE MUFFINS!!!! The same cinnamon and sugar taste and the same snickerdoodle "look" on top. These muffins are so fluffy and moist that it's hard to eat just one!


Snickerdoodle Muffins
Source: www.gimmesomeoven.com

1 c. butter, softened
1 c. sugar
2 t. vanilla extract
2 eggs
3/4 t. baking soda
3/4 t. baking powder
3/4 t. cream of tartar
3/4 t. ground nutmeg
1/2 t. ground cinnamon
1 and 1/4 c. sour cream
2 and 1/4 c. flour
2/3 c. additional sugar and 2 T. ground cinnamon mixed together for rolling

Preheat oven to 350 degrees.  Cream the butter and sugar until soft about 3 minutes. Add in the vanilla, and then the eggs one at a time and mix until each is incorporated.

In a separate bowl, mix together the flour, baking soda, baking powder, cream of tartar, nutmeg, and cinnamon.  Add the flour mixture and the sour cream alternately to the egg-butter mixture, scraping the bowl occasionally.

Using an ice cream scoop, scoop out muffin batter one at a time and drop into a shallow bowl filled with the cinnamon sugar mixture.  Roll the “ball” of batter around in the mixture until it is covered completely in cinnamon sugar, and then place into a prepared (either greased or with liner) muffin tin.  (Each ball of batter should fill about 3/4 of a muffin tin.) Depending on the size of your tins, you should get about 14 to 18 muffins. Bake them for approx. 20-22 minutes or until they are golden brown.


Do you know the best thing about these? You no longer have to feel guilty about eating a snickerdoodle for breakfast. That's what these Snickerdoodle Muffins are for! :)