Monday, October 31, 2011

Halloween Recap

Happy Halloween everyone! I hope everyone has fun {and stays warm} while trick or treating with your little ones tonight. I know my two are super excited to go knocking on doors for candy!

Here is a Halloween recap of some fun Halloween treats I've made over the last couple of years. Enjoy!

Jello worms, pumpkin Rice Krispies, and Nutter Butter ghosts


Haystack Creatures


Owl Smores


Candy Corn Cookies


Candy Corn Pudding


and Halloween Cake Pops


Happy Halloween from my family to yours!

Sunday, October 30, 2011

Pumpkin Rice Krispie Treats

Last but not least, we made Pumpkin Rice Krispie Treats this year. Aren't these cute? Just make your standard rice krispie treat recipe, add red and yellow food coloring, shape into pumpkins, and top with a green gum drop "stem".

This recipe came directly from Rice Krispie's website however their version is a bit more fun. They are called Surprise Pumpkin Treats and they actually hid a small piece of candy inside. So whether you decide to make the surprise treats or plain treats like mine, they make a great treat for Halloween!


Saturday, October 29, 2011

Super Easy Nutter Butter Ghosts

The second Halloween treat that my son and I made this year were Nutter Butter Ghosts. I dipped the Nutter Butters in the white chocolate and C enjoyed putting their eyes (mini chocolate chips) on them! Super easy, super fun Halloween treat!


Friday, October 28, 2011

Jello Worms


My son and I had a blast in the kitchen today. With only three days left until Halloween it was time for this momma to get on the move if we were going to make any Halloween treats this year! First off of this year's to-do list...worms! Edible worms!!! My preschooler got the biggest laugh out of these and I must admit that eating them brought out the kid in me too.


This is such a cute idea and comes from Mel's Kitchen Cafe. She has a wonderful PDF that has step by step pictures showing how to make these worms.

Mel's worms turned out greyish in color. Mine were more green. The reason for this is because I only had a 3 oz. box of purple gelatin (the recipe calls for 6 oz. and then using green food coloring). So instead I used a 3 oz. box of purple gelatin and a 3 oz. box of green gelatin. They still turned out great and I love my green worms!


Thursday, October 27, 2011

Cinnamon Rolls

We learned how to make these cinnamon rolls in my Intro to Baking & Pastries class. I fell in love with them immediately. I mastered them for my final and have since made them several times...for 2 of my neighbors, for some out-of-town guests, and some just for me.


Tuesday, October 25, 2011

Chinese Chicken Wings

Here's another wonderful Chinese recipe that my father-in-law taught me how to make. My hubby is so excited that I can make this now because it's one of his favorites!

Chinese chicken wings are super easy to make. I served them with white rice and fresh green beans. Serve the sauce on top of the white rice and call me when you make this so I can invite myself over for dinner. :)


Monday, October 24, 2011

Culinary School - Week 4 (Cake class only)

WARNING - This post may make your mouth drool. Please have a towel or kneenex handy while viewing...

Today, Advanced Cakes and Classical Tortes class was all about pies and ice creams! You aren't going to believe all the different pies/tarts we made as a class. There were...
Coconut Cream
Pear Frangipane
Dutch Apple
Traditional Apple
Lemon Meringue
Raspberry Lemon Meringue
Key Lime
Phyllo Fresh Fruit
Chocolate Raspberry
Pumpkin
Pecan
Strawberry Chiffon
Strawberry Marscopone
Chocolate Espresso

Then on top of that we made these ice creams...
Fresh Mint (I made this one and it was so refreshing!)
Spiced (w/Cinnamon and Star Anise)
Almond
Strawberry
Bailey's Cream
Praline Cream
Chocolate
Rum Raisin
Salted Caramel

Sunday, October 23, 2011

Culinary School - Week 3

Week 3 is over and I needed a nap today to recover from the busy week! Here are the cakes that I personally made in cake class this week. Like I said earlier, everything is individual work in this class.


This is a german chocolate cake. Two layers of chocolate chiffon cake with a layer of german chocolate filling in the middle and on top, iced with chocolate buttercream, and garnished with chopped pecans on the sides.

Saturday, October 22, 2011

Parmesan Roasted Broccoli

I'm very fortunate that broccoli is one vegetable that both of my little kids love. I usually just steam it and then lightly salt it and sprinkle with some shredded Cheddar cheese. I saw this recipe for roasted broccoli on Pinterest and then later checked out Barefoot Contessa's cookbook from my local library.

I was a bit skeptical at first. Lemon zest and lemon juice on broccoli just didn't sound very appealing. Let me tell you though...it is amazing!!! It is new favorite way to cook broccoli. It was packed with flavor and the lemon taste complimented the broccoli very well. My whole family loved it. I didn't have any pine nuts or basil on hand so I left them out. It was still good without them but I definitely want to add some pine nuts next time!


Thursday, October 20, 2011

Make Ahead Muffin Melts

I have so many breakfast recipes I'm wanting to try and not enough time on the weekends so I told my hubby we were going to have to start eating "Brinner" once a week.

Brinner = Breakfast for Dinner

Besides, breakfast is great any time of the day. To start off our brinners I just had to try this recipe from The Pioneer Woman. She never disappoints! This turned out to be a fabulous breakfast dinner!

By the way, did you notice I used my homemade English muffins for this meal? For more information on how to make your own English mufins, check out my previous post {here}.


Tuesday, October 18, 2011

A Quick Lesson On : Yeast

Baking a fresh loaf of bread can be tricky if you don't have a good understanding about yeast. Yeast comes in 3 different forms: Compressed (Fresh) yeast, Active Dry yeast, and Instant (or Rapid Rise) yeast.

Compressed Yeast
Compressed yeast is a mixture of yeast and starch with a moisture content of about 70%. It is also referred to as fresh yeast and must be kept refrigerated. It should be creamy white and crumbly with a fresh, yeasty smell. Compressed yeast should softened in warm water at 100°F before being added to bread dough. Under proper storage conditions, compressed yeast has a shelf life of 2 to 3 weeks.


Active Dry Yeast
Active dry yeast differs from compressed yeast in that virtually all the moisture has been removed by hot air. The absence of moisture renders the organism dormant and allows the yeast to be stored without refrigeration for several months. When used in preparing doughs, dry yeast is generally rehydrated in a lukewarm (110°F) liquid before being added to the other ingredients. It should be stored in a cool, dry place and refrigerated after opening.


Instant Dry Yeast
Instant dry yeast has gained popularity because of its ease of use; it is added directly to the dry ingredients in a bread formula without rehydrating. The water in the formula activates it. Like all yeasts, instant dry yeast is a living organism and is destroyed at temperatures above 138°F.


You can use whichever type of yeast you prefer just remember that dry yeasts are at least twice as strong as compressed yeast. You'll need to use the formulas below if you have to substitute yeasts. For example, if a recipe calls for compressed yeast, but all you have is Active Dry yeast at home.

Compressed (fresh) Yeast x 0.5 = Active Dry Yeast
Compressed (fresh) Yeast x 0.33 = Instant Dry Yeast
Active Dry Yeast x 2 = Compressed (fresh) Yeast
Active Dry Yeast x 0.75 = Instant Yeast
Instant Yeast x 3 = Compressed (fresh) Yeast
Instant Yeast x 1.33 = Active Dry Yeast

Use these formulas to convert from one type of yeast to another. Happy baking!

Sunday, October 16, 2011

Culinary School - Weeks 1 and 2 (Chocolate and Sugar classes)

Saturdays are long days for me! I wake up at 5:15am, leave for school by 6am and don't get home until 6pm. There's a quick 30 minute break for lunch and that's it. The rest of the day is spent playing with chocolate and cooking sugar! (Lots of fun!!!) Saturdays are when I have my Chocolate & Confectionary class and Sugar Works class.

The first week of Chocolate class we watched a video about the history of chocolate, learned all about tempering chocolate (much more involved than just melting chocolate!!!), and we got to sample different types of chocolates (dark chocolate, milk chocolate, bittersweet chocolate, white chocolate, and plain cocoa butter - which tasted like eating a crayon or chunk of wax.) We also got to practice tempering chocolate for the first time. There are 2 ways of going about this - tabling or seeding. We spent the remainder of the class working on a group centerpiece that is due in a few weeks.

During week 2 of chocolate class we learned how to make truffles. OH MY!!! These truffles are dangerous! They were so amazingly good!!! Each person got assigned two different types of truffles. I got to make 1) white chocolate truffles with pistachios, dipped in milk chocolate and chopped hazelnuts and 2) dark chocolate truffles. We also had to make chocolate bowls (by dipping balloons), chocolate straws and chocolate cigarettes.

My white chocolate pistachio truffles are in the top right hand corner (the one covered in nuts):

English Muffins

If you've been following my blog at all you know I am a huge fan of making bread. I love making bread more than anything else! Yes, it takes a lot of time and patience but nothing can beat the smell of fresh bread baking in your oven or taking that first bite into bread that you baked just that morning.

This time I set out to make English Muffins. Not a difficult bread to make but it was the first bread that was not baked in an oven. English Muffins are actually baked on top of a lightly greased griddle or skillet. The whole family loved them, especially after I slathered them with some butter and homemade strawberry jam!

*As always, I only made 1/2 a recipe. This keeps me from gaining 100 pounds a year! :)


Friday, October 14, 2011

Culinary School - Weeks 1 and 2 (Cake class only)

My new classes are in full swing! I am currently taking 3 classes: Advanced Cakes and Classical Tortes, Chocolate & Confectionary, and Sugar Works. My previous classes were 100 level courses but I have began the 200 level courses so most everything is individual work now. The classes are more intense and the Advanced Cakes and Classical Tortes class in particular mimics a real working environment.

During week one of Advanced Cakes and Classical Tortes we made Yellow Chiffon cakes, Chocolate Chiffon cakes, Dobos cake layers, Dobos Buttercream, Sacher Biscuit, Cherry Filling, and Chocolate Ganache. We ran out of time so all the cakes were frozen and we were able to assemble some of them during week two.

I finally got smart and took my camera to class with me. (I should have done that in all my previous classes!) So now I will be able to show you what I make in class. It will really add to these posts. So for week 2 we made German Chocolate cakes, Chocolate Flourless cakes, Pastry Cream, German Chocolate Icing, and Chocolate Glaze. Even though this class is 7 hours long we are always strapped for time. We only had time to assemble 3 cakes.

Here is my black forest cake. Three layers of chocolate chiffon cake, layers of cherry filling, iced with chantilly cream, and decorated with maraschino cherries and chocolate shavings.

Thursday, October 13, 2011

French Bread

I needed something to go with my Tomato Tortellini Soup and French Bread was the perfect fit. It has a crunchy exterior and a nice soft and chewy inside. We dipped the bread in some Oregano flavored Extra Virgin Olive Oil and it was amazing!

I quartered the recipe below and still got 2 nice size loaves.


Tuesday, October 11, 2011

Tomato Tortellini Soup

Today I am a guest blogger over at Hanging On By A Thread. Since Fall has arrived and cooler weather is among us, K is hosting Soup Week.

Head on over to K's site to see the Tomato Tortellin Soup I made last week. Check out the rest of K's blog while you're there. She is such a creative and crafty person. She amazes me by finding dollar deals at her local Good Will and turning them into new.

Sunday, October 9, 2011

Apple Nachos

With lots of apples left from our trip to the apple orchard several weeks ago, I needed another apple idea. This cute idea for Apple Nachos comes from Taste of Home. Instead of slicing apples in wedges, cut them in circles to resemble nachos!

We learned how to make a really good caramel sauce in my Baking and Pastries class so I used that to drizzle on top then sprinkled them with mini chocolate chips and chopped pecans.


Friday, October 7, 2011

Caramel Apple Salad

Fall is officially here. My preschooler automatically associated the beginning of Fall with apple picking and so off to Wasem Fruit Farm we went! We love picking our own apples at the apple orchard. They had Gala, McIntosh, and Prime Gold ready to pick so we picked some of each. Note to self: Don't forget the bug spray next time! The mosquitos were literally swarming around us in herds!

My sister introduced me to this recipe this summer. I love it! It can be served as a side dish or as a dessert. Anyone can make it...the only direction is "Mix together and refrigerate". Doesn't get any easier than that! Enjoy!


Wednesday, October 5, 2011

Strudel Dough

I hope everyone was able to read my post from yesterday. It explained my first strudel making experience I had with a family that has done it for years! I feel quite lucky to be able to share this special recipe with you. It is my friend Mary's great-grandma's recipe. It is said that she would make strudel for her family every day! Sometimes sweet and sometimes savory. There are many things you can fill strudel with. I hope you will enjoy this treasured recipe.


Strudel Dough
Source: Grandma Schranz

3 c. Sifted High Gluten Flour
2 Eggs
1/2 t. Salt
3 T. Oil (do not use Canola oil)
2/3 c. Warm Water

Sift flour onto a pastry board, make a well in center and add eggs, salt, and oil. Add water slowly and work mixture into a soft dough. Knead dough until it becomes elastic and leaves the board clean, or pick up the dough and throw it on the board about 100 times. Form dough into a smooth ball. Cover with a warm bowl and let stand about 1 hour.

Spread a clean cloth over a large table. Dust the whole cloth lightly with flour. Place dough in middle of cloth and roll out into a large oblong. Then reach under the dough with palms up and stretch the dough until it is thin. Trim thick edges off and patch any holes with any dough that is falling off the table edges. Cover the dough with desired filling. For squash, spread with grated hubbard squash, dribble 1 stick of melted margarine over squash, sprinkle with salt, cinnamon, and sugar. Starting at each end roll both ends at the same time towards middle until each roll meets. Slice dough between rolls and place each roll on a greased cookie sheet. Brush with milk, sprinkle with sugar. Bake at 350 degrees for 40 minutes or until brown.

Apples may be substituted for squash (omit salt with apples).

Tuesday, October 4, 2011

Strudel Day!

I was honored to spend the day with the Potter family last weekend. Saturday was their annual Strudel Making Day and they invited me to join them! I had been waiting months for this day to come! I was so excited and had never made or seen strudel being made before. This is their family tradition that has been going on for the past 37 years! The recipe belongs to Mary's great-grandma and they are keeping the art of strudel making alive in their family. I had such a fun day with the Potters, eating, chatting, eating, making dough, eating, stretching dough, eating, and making strudel while learning about their family's history.

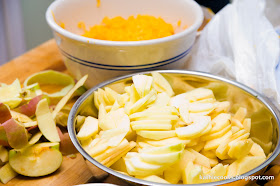
As soon as everyone arrived we all immediately pitched in to core, peel, and slice apples and shred squash. Teamwork and laughter was in the air the entire day. My friend, Mary, is on the left.


Sunday, October 2, 2011

Homemade Strawberry Ice Cream

We learned all about making ice cream, sorbets, and sherbets in class recently. I've been able to make or try all of the following ice creams: Strawberry, Chocolate and Peanut Butter, Orange Creamsicle, and Banana with Candied Pecans to name a few.

I've had an ice cream maker sitting in my basement collecting dust for the past 5 years until now. Learning how to make a homemade ice cream base and being able to turn it into any flavor I want completely sparked my interest. Oh, and did I tell you how good it was??? All the flavors I had were just amazing! I believe the Orange Creamsicle may have been my favorite but I would give them all very good ratings!

After class that day I rushed home, went straight to my basement and dug up my ice cream maker. It's one of those small ones where you put the inside canister into the freezer for overnight or longer. It's the perfect size for my family of 4 and we still had some leftovers. I had a hard time deciding which flavor to make so I went with my hubby and son's favorite: Strawberry. There will be lots more ice cream making in the new future. I don't care if summer is over. Ice cream is good any time of the year! :)

Note: I made 1/2 a recipe and was able to get two batches out of it with my small ice cream maker.